

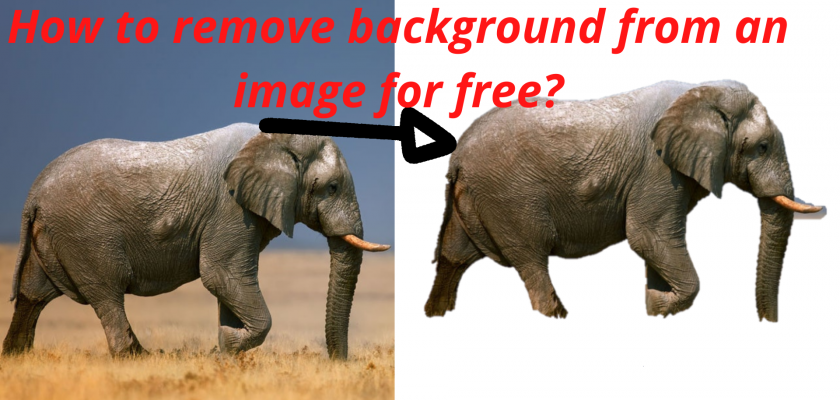
In this article, I want to show you how you can completely remove the background from a photo using an application that comes free and pre-installed with Windows 10 so that you can do something like that. Remove the background from my elephant photo and now I can do whatever I want with that photo. I can embed myself into a Word or email document or PowerPoint presentation, or I could even just save it as a PNG and use it wherever I want. We will explain step by step how you can do it.

Here I am on my Windows 10 PC, I have a photo on my desktop and I would like to get rid of this background. I just want to cut out this elephant image. How do we do that? Well, luckily an application that comes with Windows 10. It will allow us to do this. Go to the taskbar and inside the search box type paint 3D. We are going to use the paint 3D application. To remove the background, you will see that 3D paint appears as one of the best matching options. Let’s click on that. This will open the Paint 3D application. Once the application is open. Let’s click new. This will start a new project and let’s take the photo you want to remove the background from and then just drag and drop it into Paint 3D.
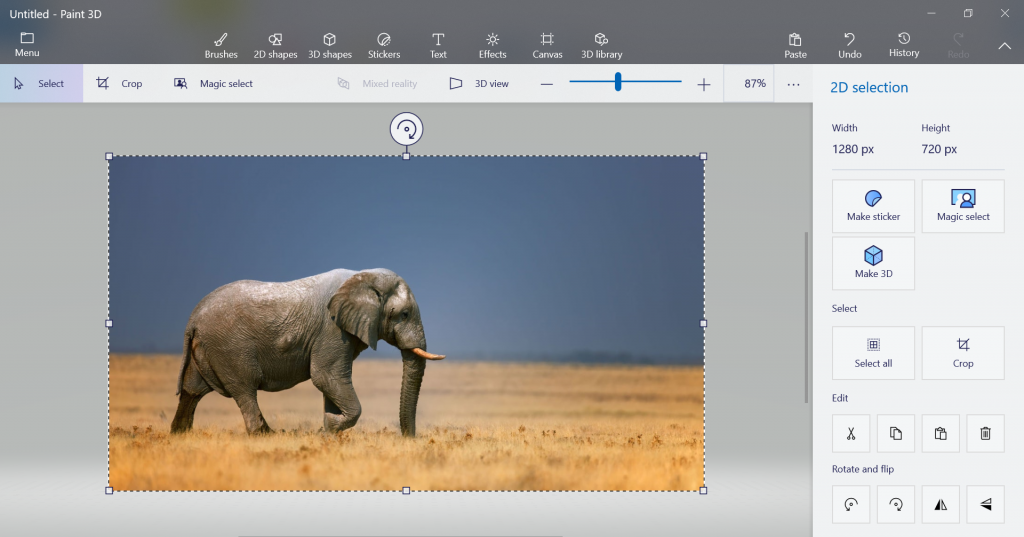
Here is my elephant photo now in 3D paint and I still have the background showing up here. How do we remove the background? It is very easy to remove the background. To remove the background, we will use something called Magic Selection and there are two ways to get to Magic Selection. You can click magic selection on the top bar or when you have selected the photo, you can click magic selection on the right side. Next, I see a rectangle appear around my photo and I need to drag the corners around the object that I want to remove from the photo. Here, I am going to select only elephant from the photo. Once you’ve selected elephant, let’s click next on the right hand side.
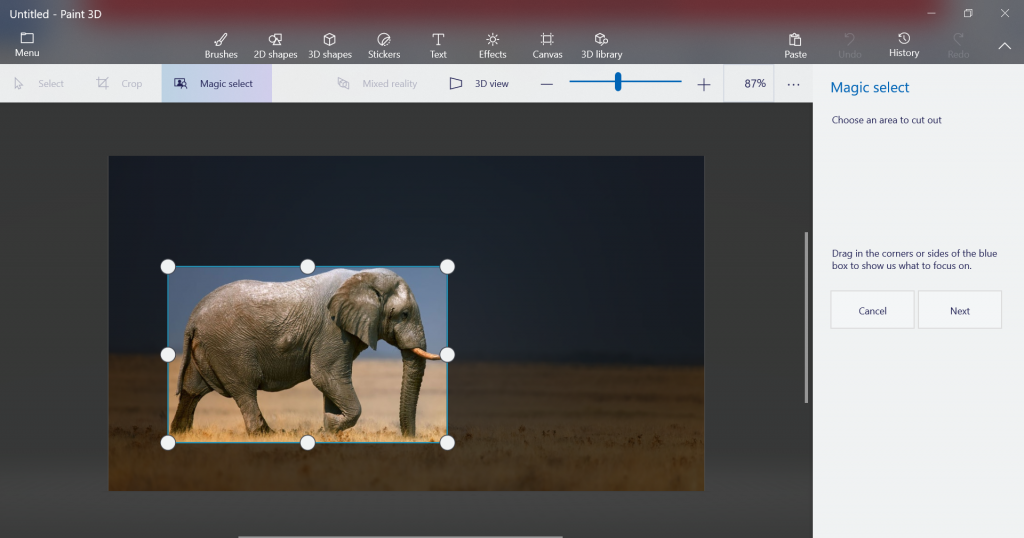
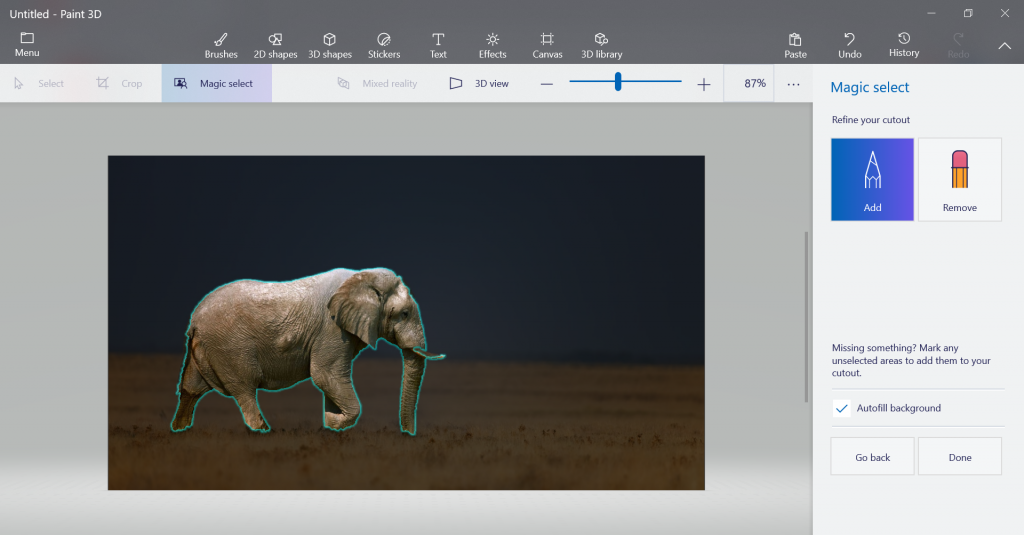
So Paint 3D has identified the elephant from the bottom, although it really hasn’t done a perfect job. But it’s pretty close. You will see in the photo that elephant teeth are missing, and I definitely want to hear that they include me. So I’m going to click add on the right side and I’m going to zoom in on my elephant photo and then I’m just going to drag a line over the elephant teeth. What this does is it helps Paint 3D realize that elephant teeth should be part of the selection.

Now I’m going to zoom out and see if it captured everything else correctly. Overall this looks pretty good now, plus you can add things that the 3D painting might have missed. If for some reason you 3D painted something selected that shouldn’t be included, you can click delete and then draw a line over it and that will remove it from the selection.
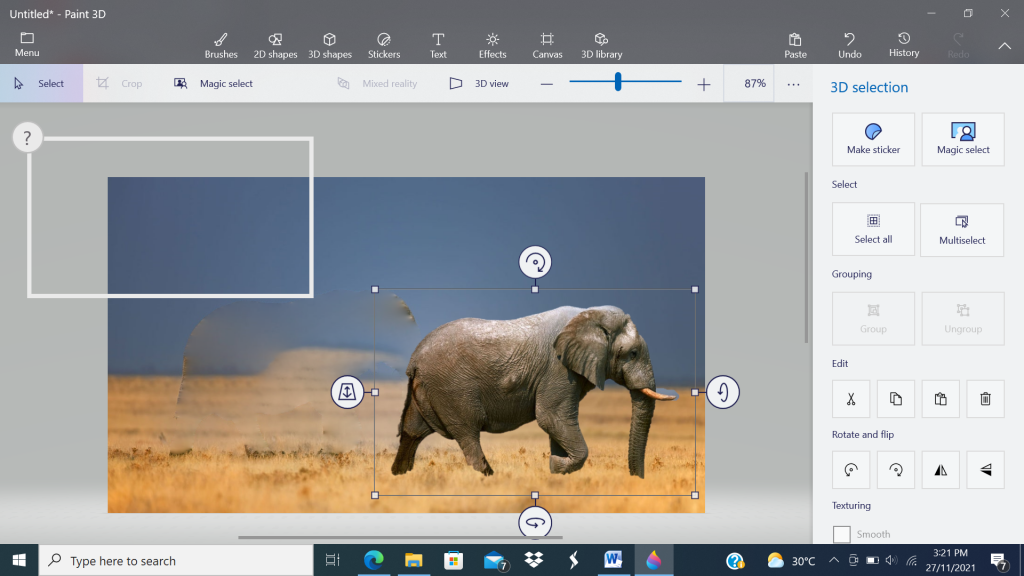
Overall though, I am quite satisfied with this choice and all that is currently selected is what I want to get out of this photo. Once you’re done adding and removing, underneath is a checkbox that says auto-complete background. What this means is that once we are done here, it will fill in the background where the elephant was standing. It is quite impressive how it does it. However if I uncheck this it would just leave a cutout or white background behind where the elephant is standing. I want to automatically fill in the background. That sounds good, so let’s click Done. I clicked Done and it still looks pretty similar.
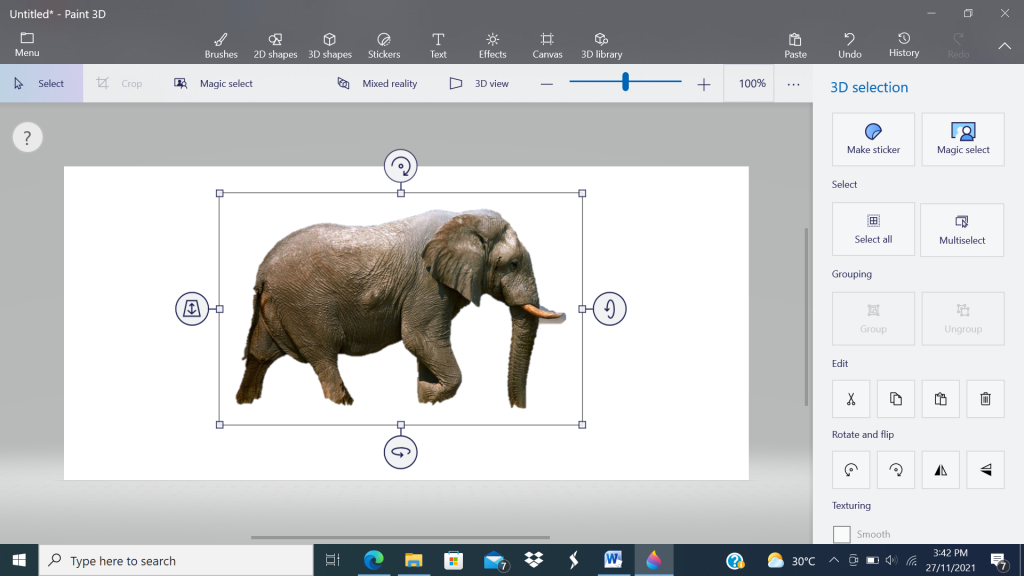
What will be the difference now if I click elephant? Look what I can remove elephant. From that position in the photo and I can place an elephant anywhere else. In fact, it could expand elephant. I could reduce the size of the elephant, and here you will notice the very good work in completing the background. Now with the elephant image here I can now use this anywhere I can press control C to copy, or I can press control X if I want to cut similarly. I’m going to copy for now and let’s see where else we can use this photo.

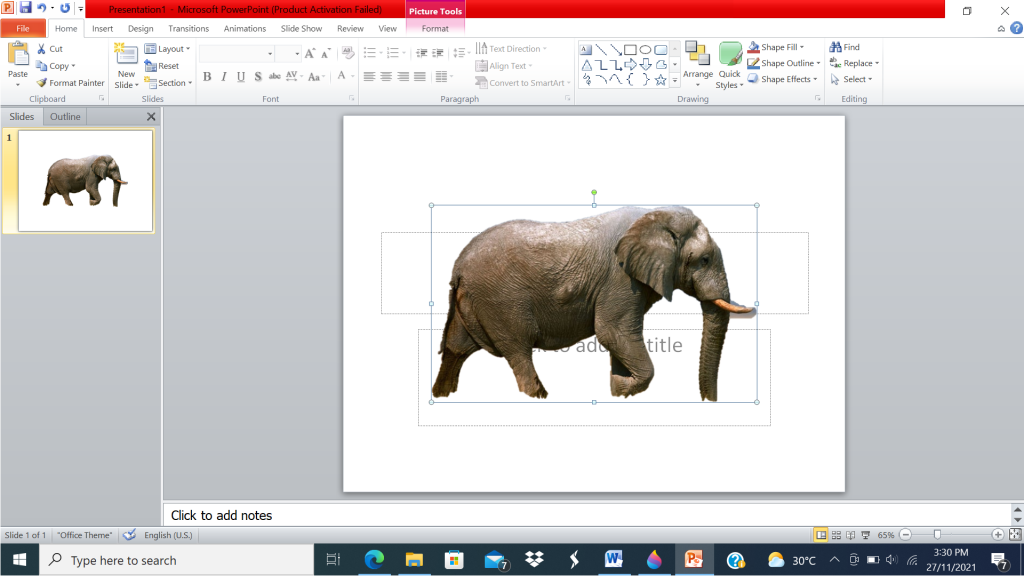
Now I’m in a Microsoft PowerPoint presentation and I’m going to press the V control to paste and there you see my 3D paint image now showing up in PowerPoint and I could adjust the size of this. Let’s say you want to save the photo. How are you going to do that? Well, let’s go back to painting 3D. I’m back in Paint 3D and how can I save an elephant without the background? Well let me copy then click left corner menu then again it will ask if I want to save my work. I’m going to click don’t save. Now I have a blank canvas and here I am going to paste my elephant photo by pressing the V control. I am going to adjust the size, so I just fill the canvas now that the elephant placed inside the canvas. I could go up to the menu and then click save as and now I can save it as a picture when I go to save it as a picture, I could select the type of file I want to save as, be it PNG, JPEG, GIF or whatever, I want to save it as. If I double click on that, you will see an elephant image with a transparent background.
Now one of the problems is that there is a lot of space to the left and right of the elephant. That is one of the downsides of saving the image in Paint 3D. You will get it. So how do we do it better? Well, we are going to use an application called paint.net and I will show you in a moment how you can get it. Paint.net is by far one of my favorite image editing apps, it’s completely free to download and install to use and it works great. Think of it as Photoshop light. It gives you most of the tools you need to edit images. It has things like layers so it even has some more advanced features on paint.Net or sourced from the paint.net website. Click on the download link and follow the installation process.
After you finish installing paint.net, you will see an application. I’m going to click on the top left corner of the file menu and go to new. This opens the new dialog and for width and height, I am going to leave this default setting. These match the dimensions of the clipboard images or the elephant image. I’m going to click OK. This then creates an image on paint.net and now I’m going to press control V to paste my image. This now pastes my image and the checked background indicates that it is a transparent background. Now you could go up to the left corner, click Save File As. This also opens in the Save As dialog and now I can choose the format I want to save it in. I’ll stick with PNG for this image. The advantage of saving an image this way is that you will not have any unnecessary space on the left and right of the image.